Salesforce Marketing Cloud | Single Journey Sends
The Salesforce Marketing Cloud (SFMC) method of sending called “Single Journey Sends” enables confirmation that the email message is sent to a specific list of recipients based on the email address field within the data extension (list). This method of sending applies to all Subscription, some Recruiting and some University Community message sends.
The first step is to build an email in SFMC Content Builder and save it to your college or unit's folder. If you are new to SFMC the New User Onboarding videos to review how to build an email in Email Builder/Content Builder.
Note: Test send your email and gain approvals before scheduling any email send.
If there are questions about the application of this sending method please reach out to OMC's Email and Automation team.
The method of sending from SFMC called “Single Journey Sends” provides confirmation that the email is sending to a specific list of recipients, based on the email address field within the data extension (list). Subscription is a perfect use case for this email execution method.
The below steps will support sending an email in the single send journey method. This process applies to use cases in the following business units (BUs) within SFMC: Recruiting, Subscription and University Community.
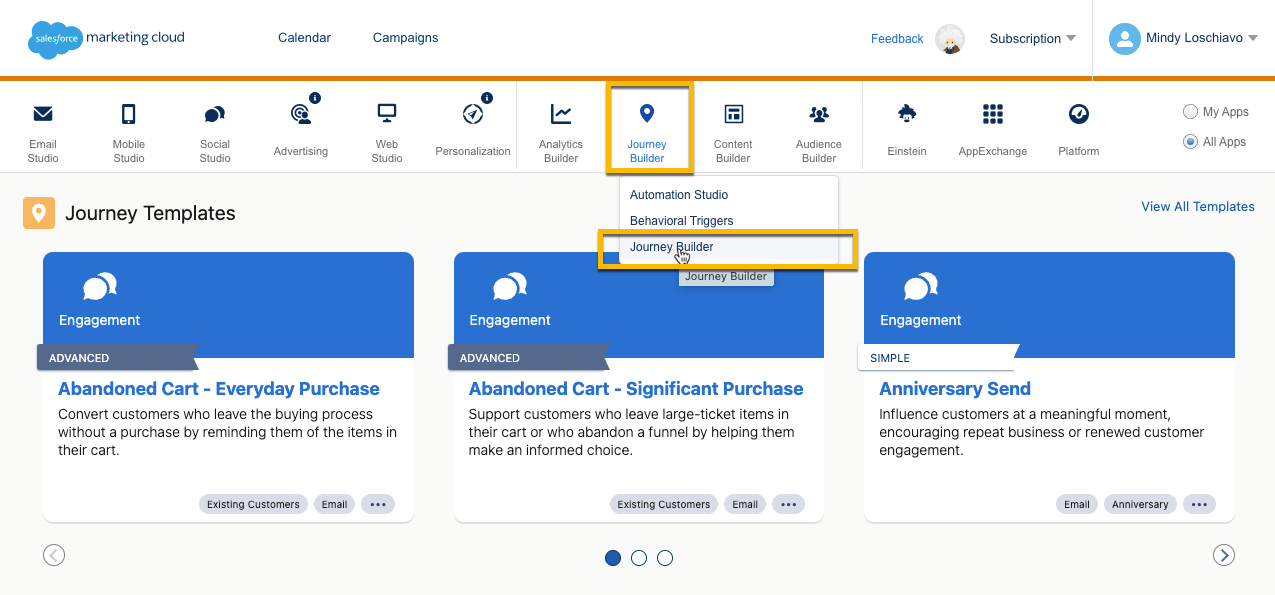
1 1. After the email content is built and the email test send is approved, navigate to Journey Builder > Journey Builder
1 Important note: The list/data extension must be saved in the Data Extension folder under your college or unit acronym.
This is a different location than the University Community training's current instructions.
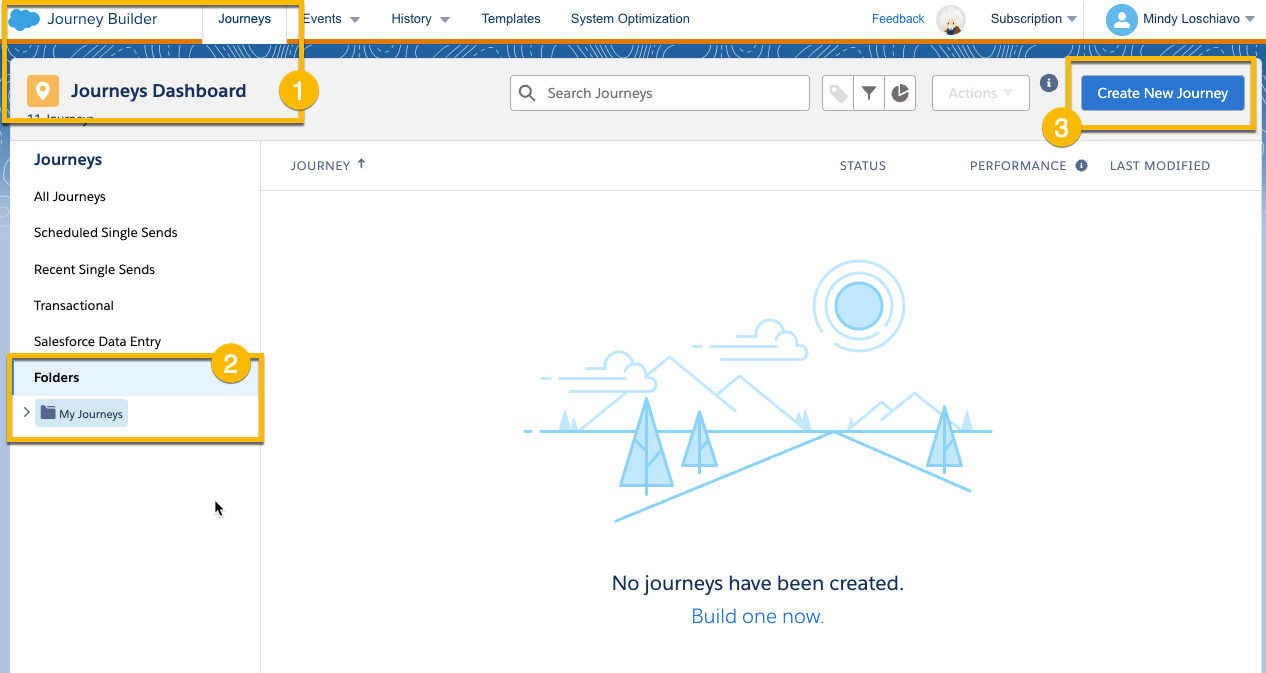
1 2. Important: On left click “Folders”, navigate to your college/unit folder (this step will save the journey to the proper folder)
- Click Create New Journey button in upper right.
- If your unit's folder is not present, you may add a folder (right click to see options)
Note: If the journey is not created in your college or unit folder, you will be able to drag and drop it there later (if scheduled move after send).
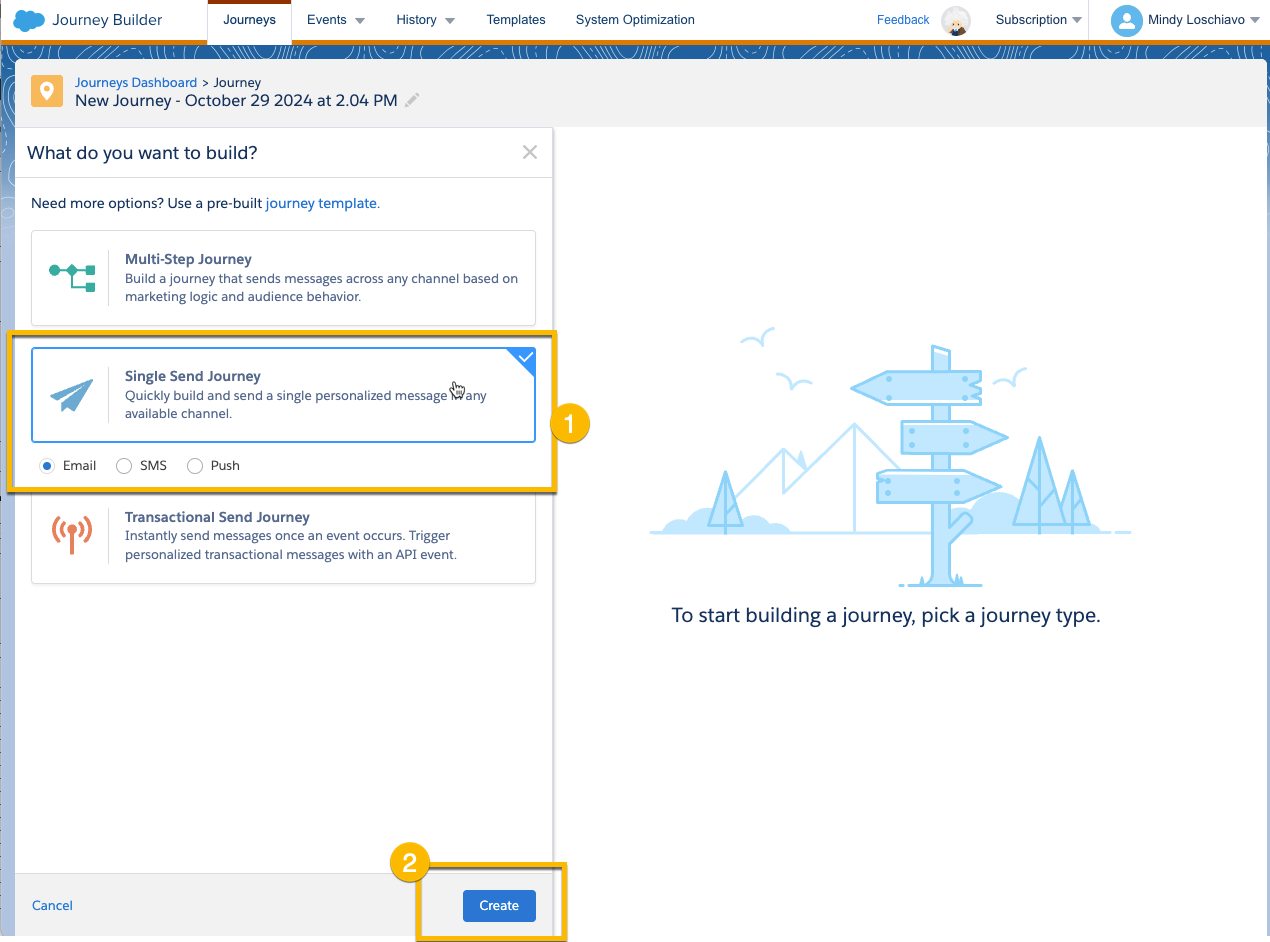
1 3. Select Single Send Journey
- Important: Name email and the Journey the same name following the UTM naming convention, this will assist with tracking the send:
- UTM code email naming convention
- unitcode_marketing-activity_fyXX_[additional-qualifiers]
- example university community: ehe_faculty-staff_fy26_newsletter-20260218
- example of subscription: usac_faculty-staff_fy26_newsletter_subscriptionid-20251108
- The naming of the email and the journey will help you find the reporting details later.
- SAVE OFTEN from this point forward (upper right of screen).
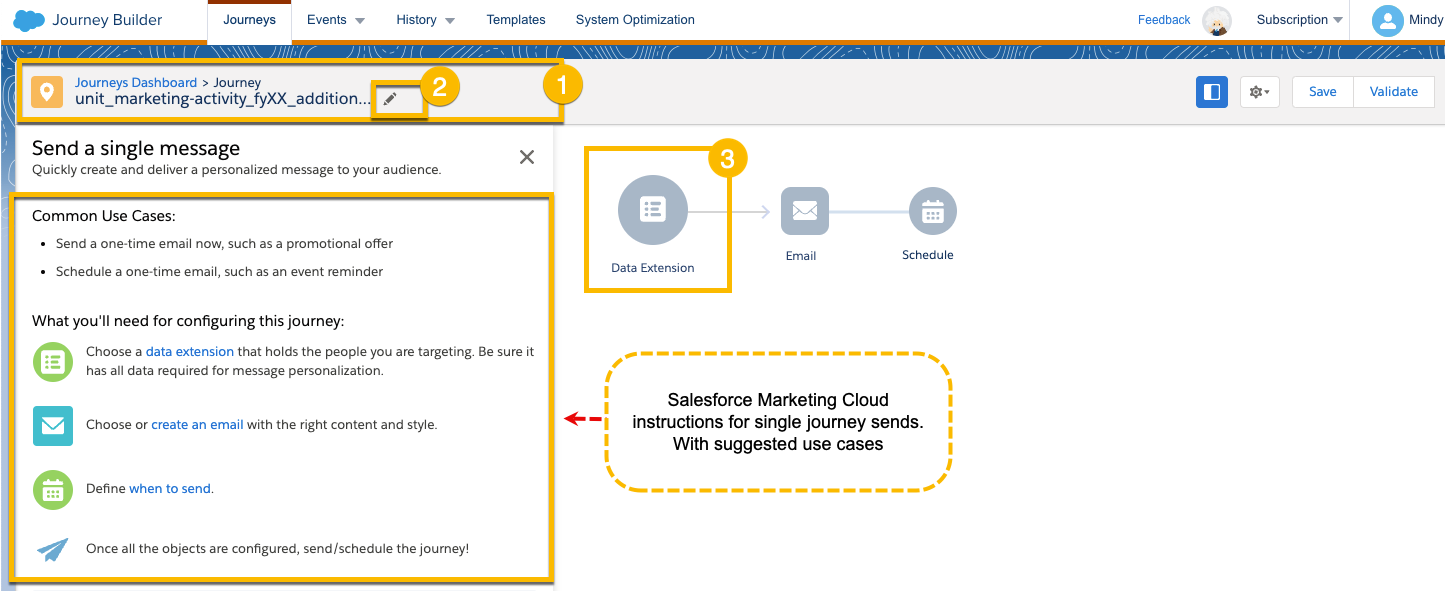
1 4. Select Data Extension
- Note: Data Extensions need to be saved in the "Data Extension" or the Shared Data Extension" folders. The Journey tool will not see DEs/lists saved in the "Shared Salesforce" and Shared Salesforce Data Extensions: folders
- Select DE/list: Data Extensions > College/Unit Folder > Choose correct audience list/DE
- Click blue Summary button on bottom right
- Click "Done" on journey setup screen
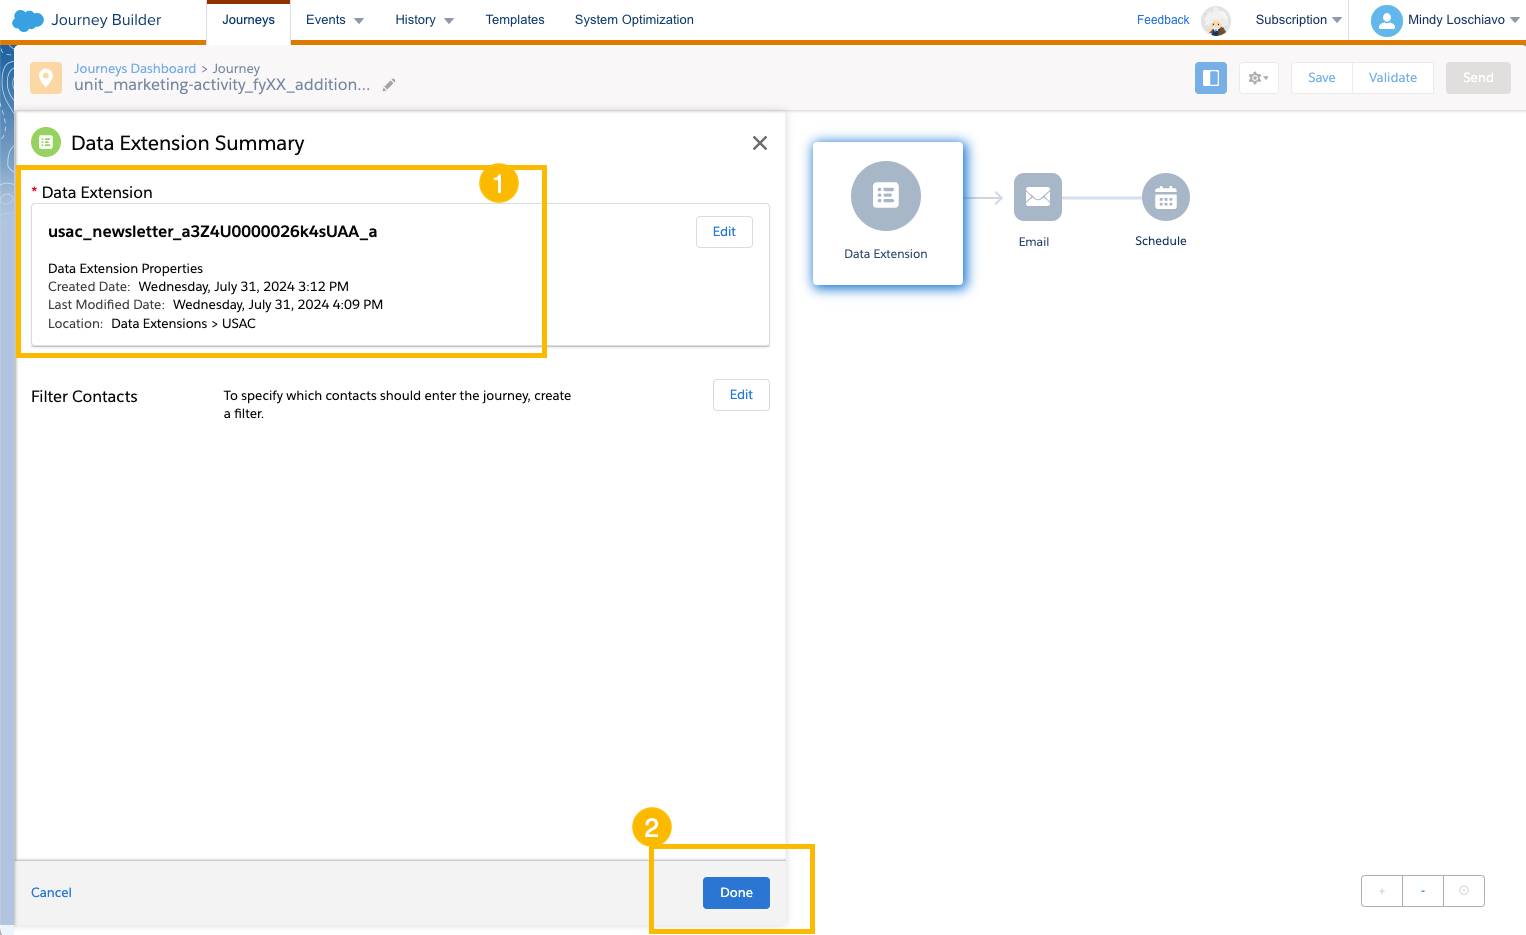
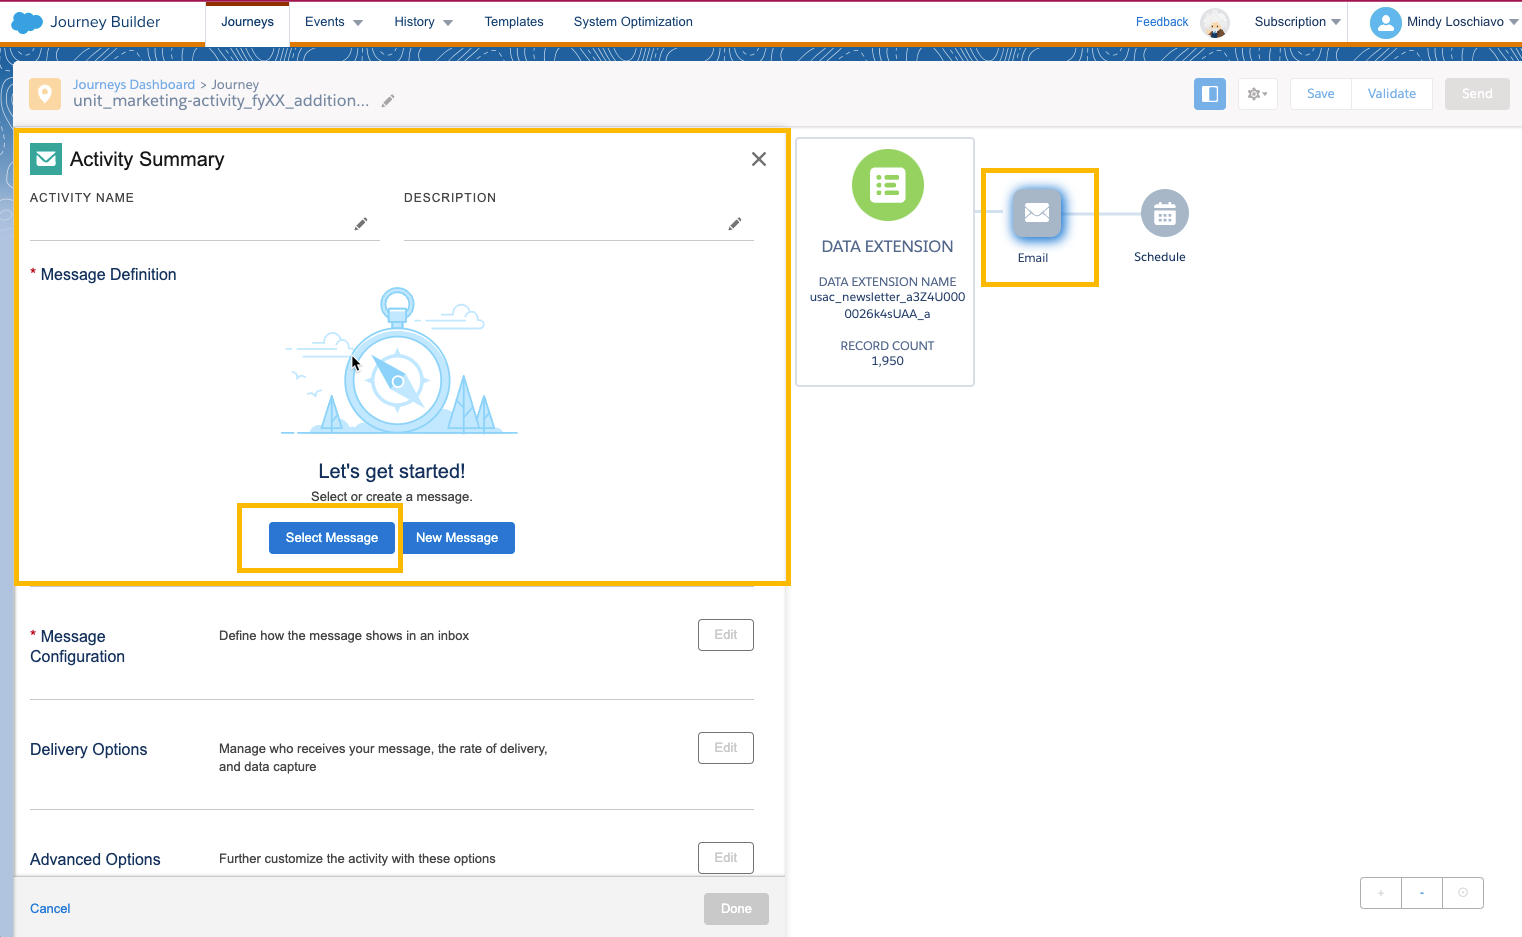
1 5. Click Email Icon
- Navigate to the email already built Email Studio (we suggest it is built before creating the journey)
- It is possible to build your email by navigating to Email Studio's Content Builder from Journey Builder
- Always test and preview the email before sending (gain all approvals)
- Click blue "Summary" button on bottom right
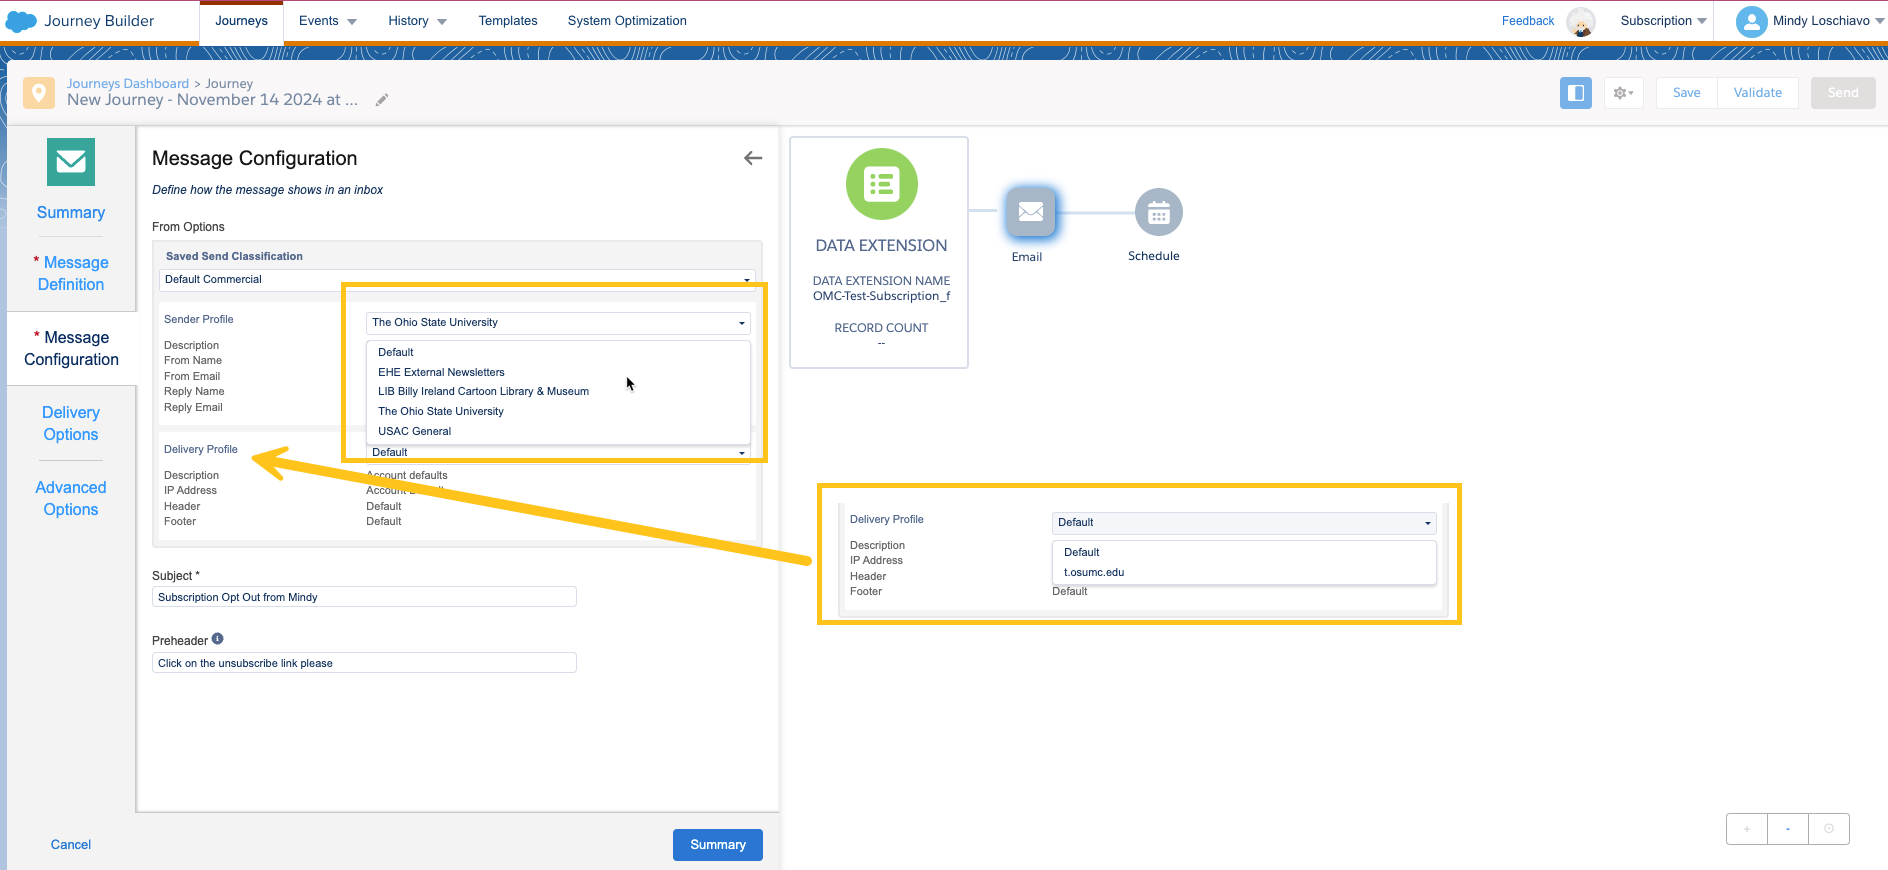
1 6. Edit message configuration
- Send classification – dropdown > Default commercial (Subscription or Recruitment, must have an unsubscribe) > Default transactional (University Community only)
- Sender profile (envelope of email) > select appropriate sender profile for the audience and content
- Note: Check this everytime you send to be sure it hasn't changed due to other users in the business unit
- Click blue "Summary" button
1 7. Delivery Options
- Subscription:
- Skip this section > Uncheck Send Tracking Results to Sales Cloud.
- Exception: Keep checked there is a business reason to track this send in the CRM for your contacts.
- Skip this section > Uncheck Send Tracking Results to Sales Cloud.
- University Community:
- Manual List Upload > Uncheck Send Tracking Results to Sales Cloud if the list was manually uploaded.
- Automated Data Extension (list, Connected Data) > suppress emails from sending to sales cloud should be checked when audience content is coming from the CRM, which is true for Connected Data, data extensions
- Recruitment:
- Date Extensions are created from Salesforce CRM data
- Automated Data Extension (list) > suppress emails from sending to sales cloud should be checked when audience content is coming from the CRM, which is true for Connected Data, data extensions
- Click blue "Summary" button
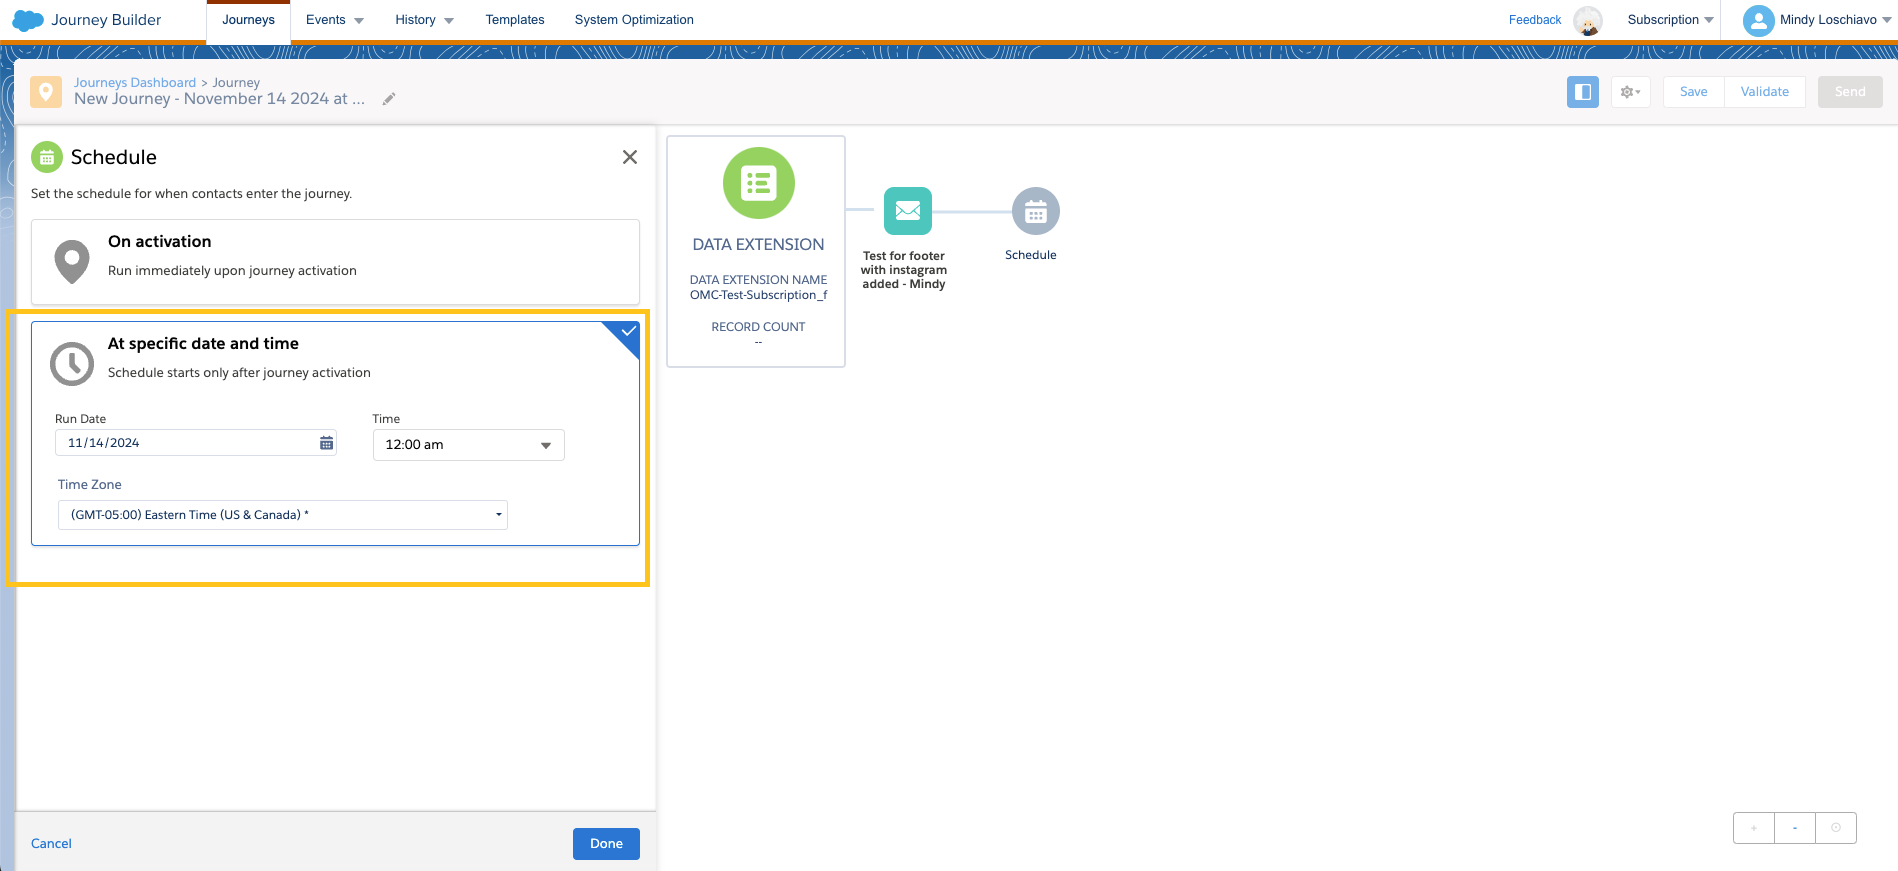
1 8. Click Schedule button
- Choose "At a specific date and time" and enter the details for the send
- Check the Team-up Calendar for similar sends and do not overlap or send on blacked-out days
- Enter your email send in this calendar if you have not already
- Select the specific date and time of this email send
- Click Done
- SAVE
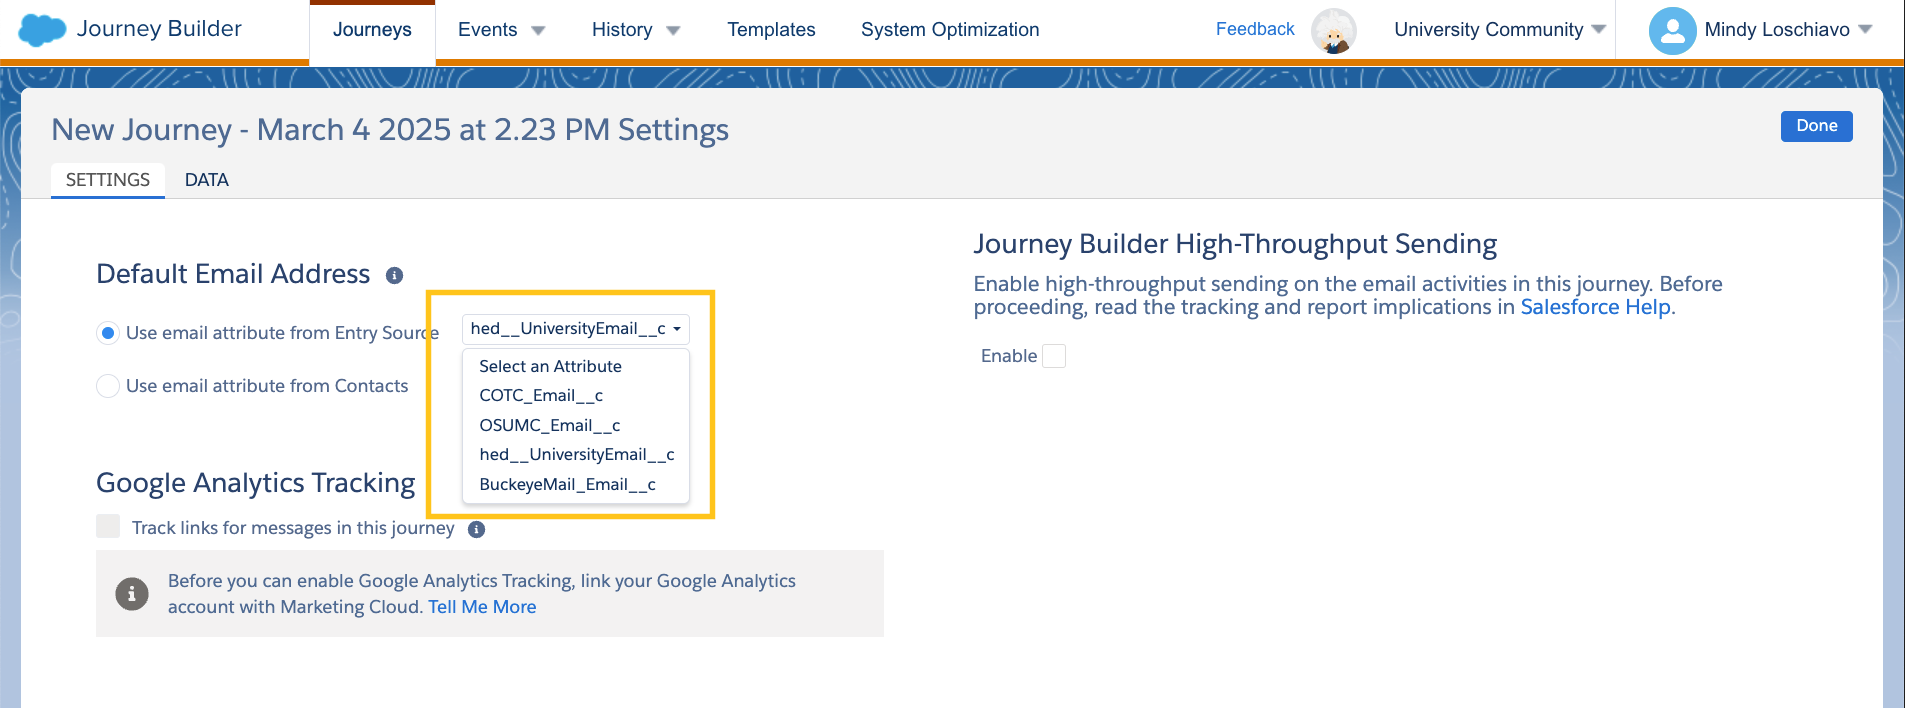
1 9. Click "Settings" (gear icon) in top right, go to Journey Settings
- Use email attribute from Entry Source, in dropdown select the proper field for the data:
- Subscription audiences > Email__C (data field containing email address)
- University Community or (parent) Ohio State University
- hed__UniversityEmail__c (@osu.edu)
- OSUMC_Email__c (@osumc.edu)
- BuckeyeMail_Email__c (@buckeyemail.osu.edu)
- COTC_Email__c
- List uploads email address column name (will vary, note what is in the list's column heading)
- Recruitment
- This is important to ensure the email is sent to the proper email addresses.
- Click Done
- Click SAVE
- Click Validate
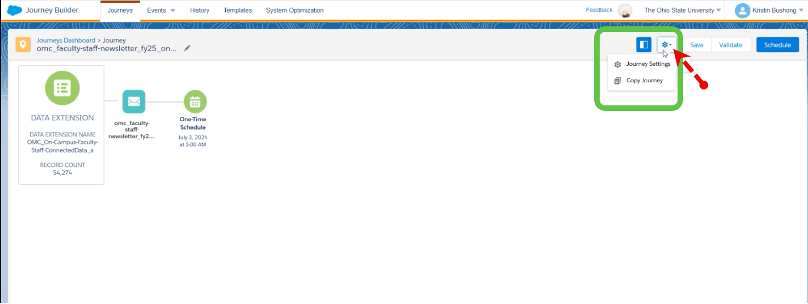
1 10. Validate and Activate the Journey
- Click Validate
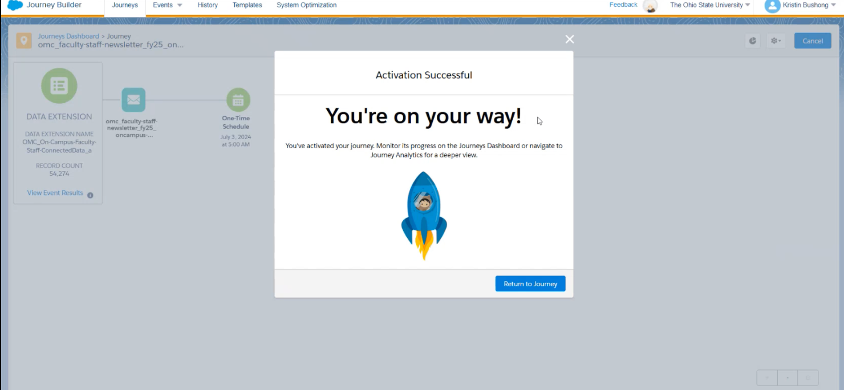
- Activate the Journey, click the "Activate" button
- Activate will make the journey Live > Scheduled (rocket ship) > take a (screenshot > SAVE THIS for your records, it shows the audience DE, the email sent and the date/time of send)
- Click "Return to Journey"

Tracking:
To see the scheduled single journey send, there are two options:
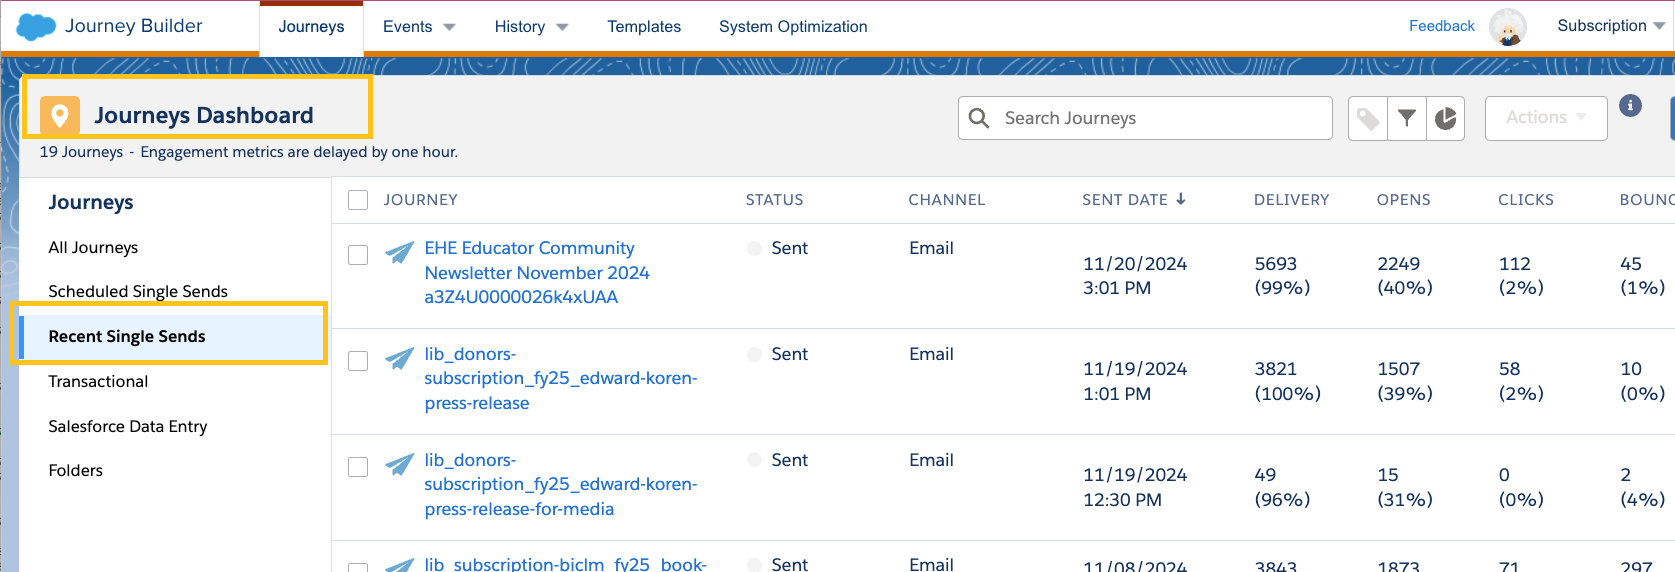
- In Journey Builder, select the Scheduled Single Sends option in the Journeys Dashboard
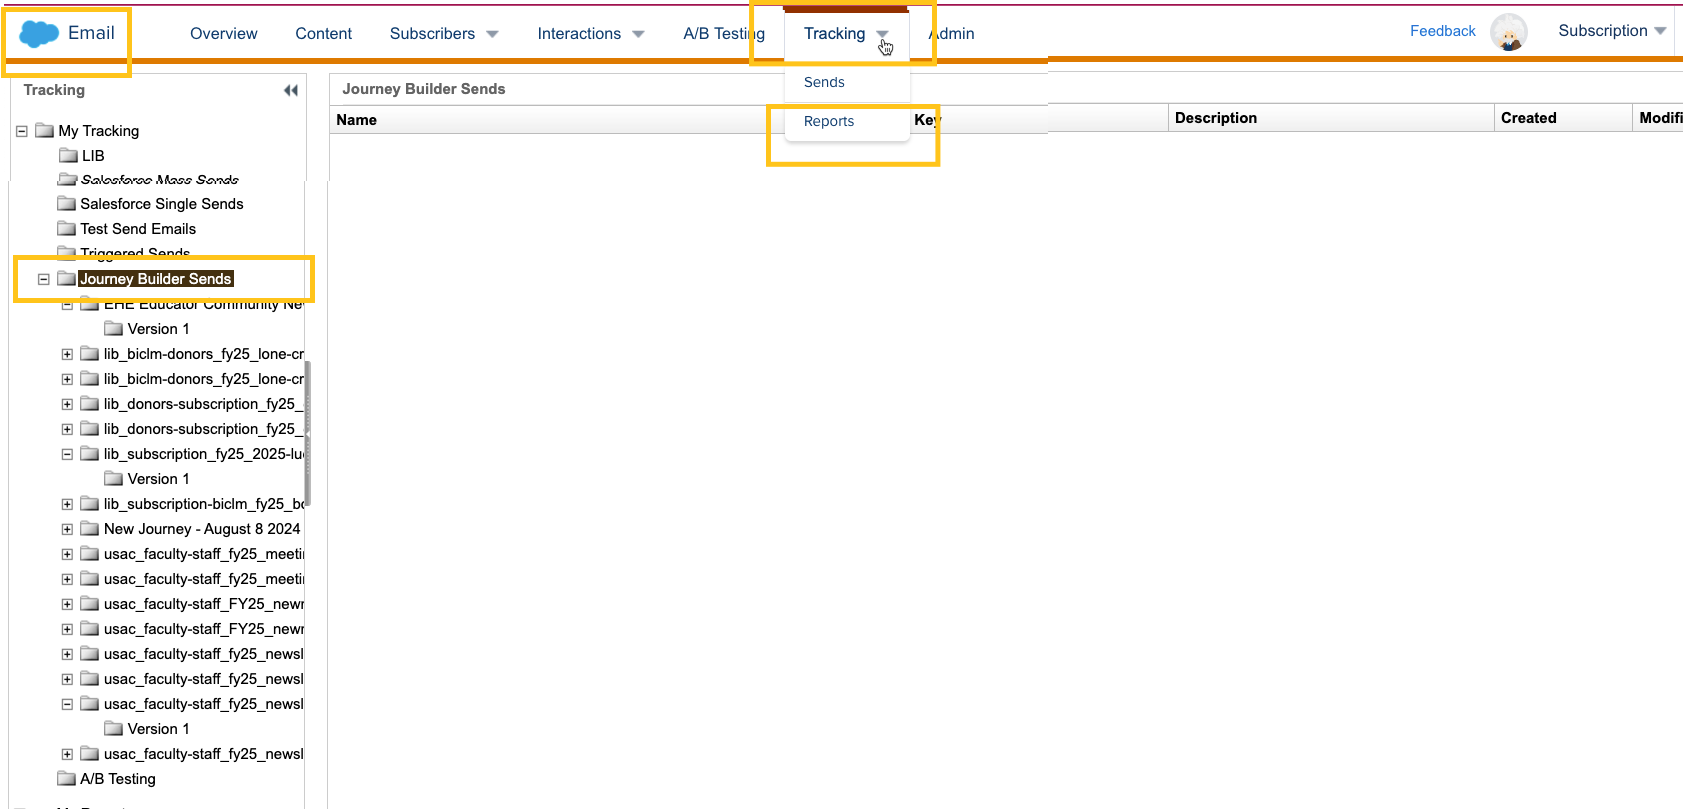
- Or navigate to Email Studio > Tracking > Sends (this is for scheduling and engagement metrics after send

Reporting:
To see the engagement for single journey sends, there are also two options:
- In Journey Builder, select the Recent Single Sends option in the Journeys Dashboard
- Or navigate to Email Studio > Tracking > Reports (this is for engagement metrics after send)
If you need to CANCEL a send, go to Journey Builder:
- Look for the scheduled journey:
- Click the blue "Cancel" button
After cancelling you will need to build or duplicate the single send journey and start a new send rather than modifying it.
