SFMC | Email Personalization
1 Personalization strings
Also known as merge fields, these allow you to insert field values for an individual contact into your email. Salesforce Marketing Cloud (SFMC) processes each of these strings individually for each contact at the time of send. These strings may be used to include values from system attributes or Data Extension attributes. They can be included within subject lines, preheaders or content areas of the email body.
2 Data Extension attribute personalization strings
Most commonly used personalization string; these are used to pull in field values from the data extension you are sending to.
Note: If you are sending to more than one data extension, all data extensions used must include the field you are personalizing with. For example, if you are sending to an alumni data extension and a donor extension, both of them must have the Name_Casual_Salutation field included in order for you to use that field for personalization.
3 System data personalization strings
These personalization strings are not dependent on the data fields available in the data extension(s) you plan to send to. These strings will work in any email.
Here are the most commonly used strings:
String | Description | Example Output |
|---|---|---|
%%view_email_url%% | URL to view the email in a browser window | |
%%xtmonth%% | Full name of the month when email is sent | January |
%%xtmonthnumeric%% | Current month as a number | 1 |
%%xtday%% | Current day of the month when the email was sent | 15 |
%%xtdayofweek%% | Current day of the week when the email was sent | Monday |
%%xtyear%% | Current year when the email was sent (often used for copyright date in email footer) | 2024 |
%%xtshortdate%% | Current date when the email was sent in short format | 01/15/2024 |
%%xtlongdate%% | Current date when the email was sent in long format | Monday, January 15, 2024 |
How do I insert personalized fields into my email?
Step 01
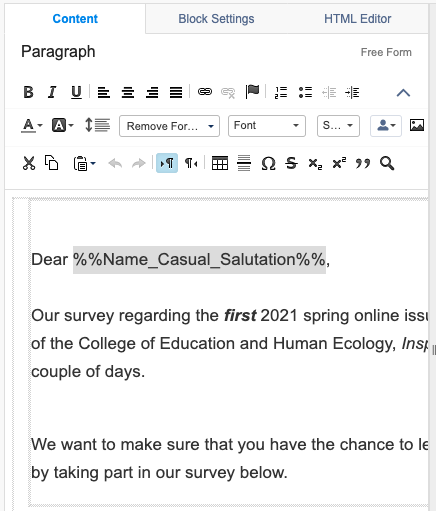
In the email editor, highlight the placeholder text you want to personalize, or place your cursor where you want to insert the personalized field within the body of your email. If you're using an email created with pasted html, you'll click within your code. If you're using an email created from a template, you will click the content block you want to add the personalization to, then edit the text in the content block editor.
Step 02
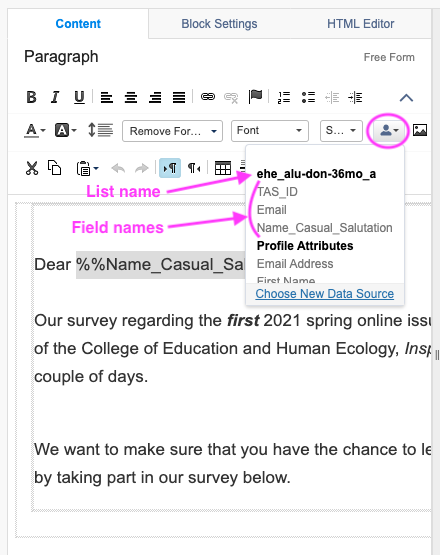
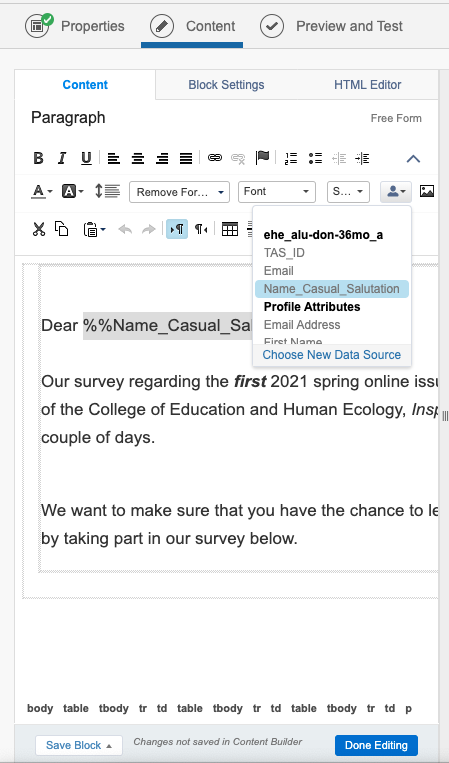
Click the personalization (person) icon and you will see all of the available fields listed under your selected list. DO NOT select the fields listed under "Profile Attributes" as these fields are not properly configured.
Step 03
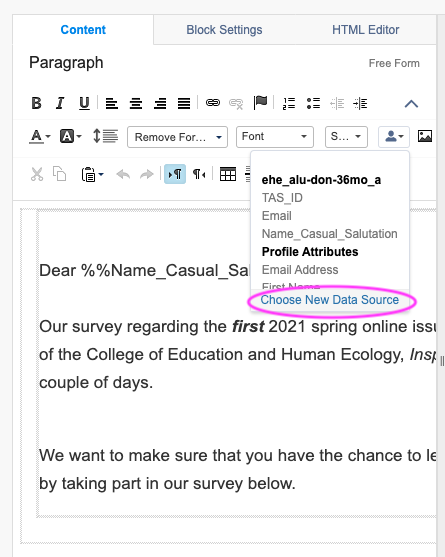
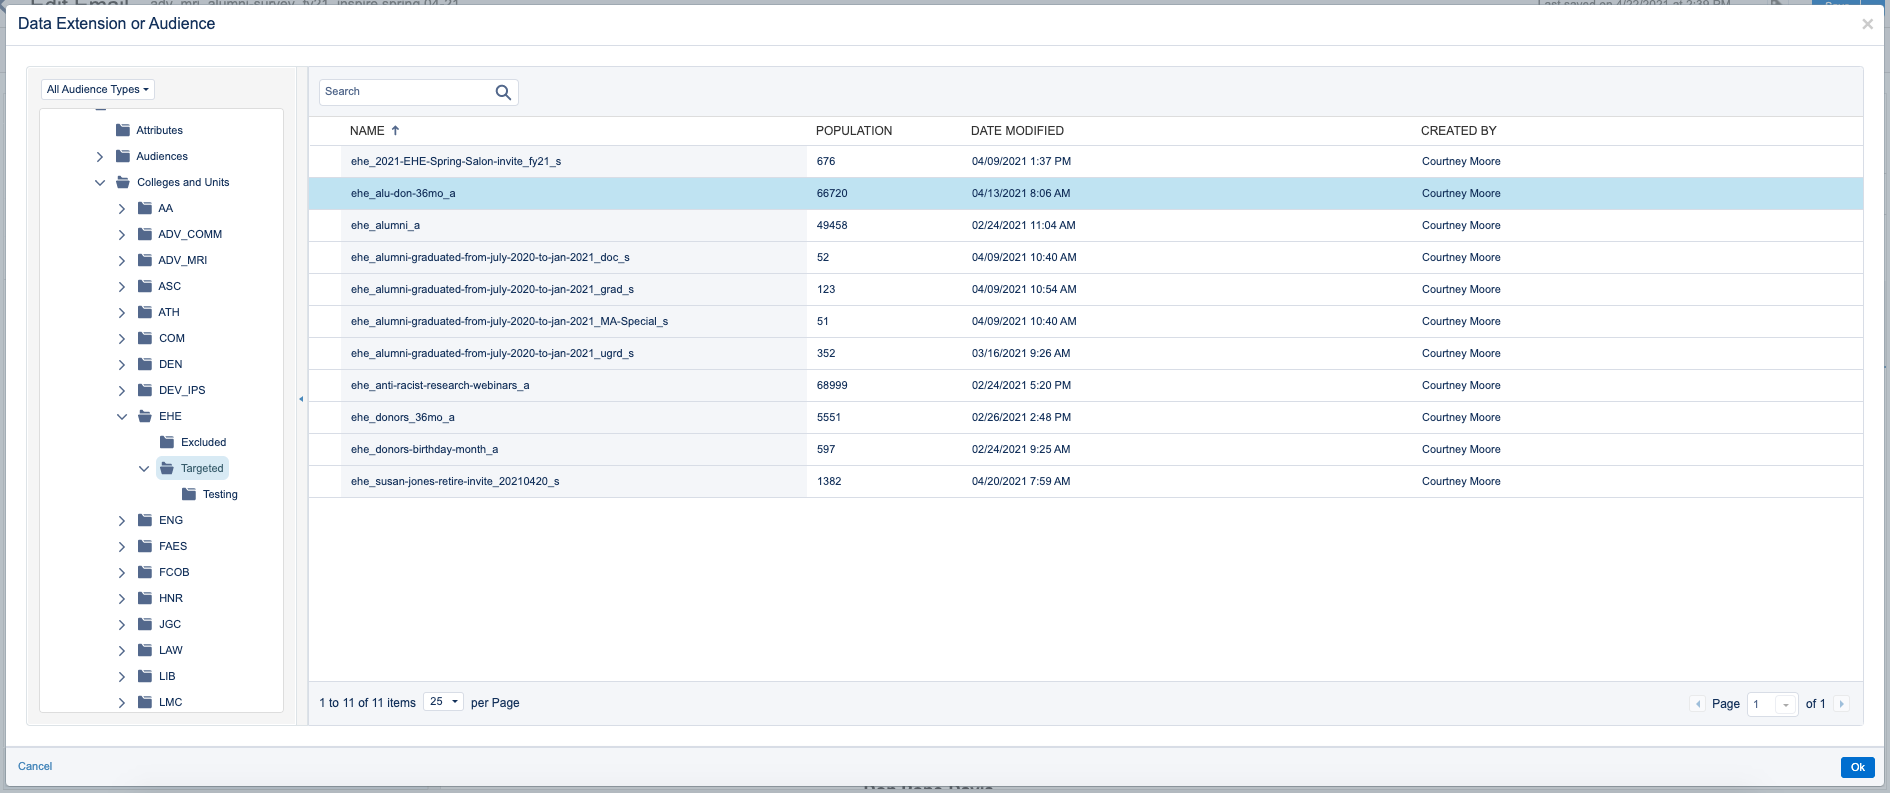
If your list isn’t currently selected, you can click the “Choose New Data Source” link, navigate to your list, and select it. Click the "OK" button.
Step 04
Once your list is added, the list of fields available from that list for you to insert into your email will update.
Step 05
Click on the field you want to insert and it will be added to your email.
Step 01
In the email editor, click within your subject line or preheader field at the top of the email. Highlight the placeholder text you want to personalize, or place your cursor where you want to insert the personalized field.

Step 02
Click the personalization (person) icon that pops up for subject line or preheader, then follow steps 2-3 above.


Step 01
When you're ready to preview and test the email, click the "next" button in the top right from the email editor.
step 02
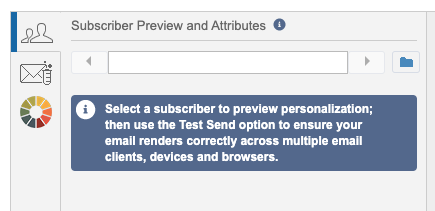
Click the blue folder icon to select a contact to preview your personalization with.
Step 03
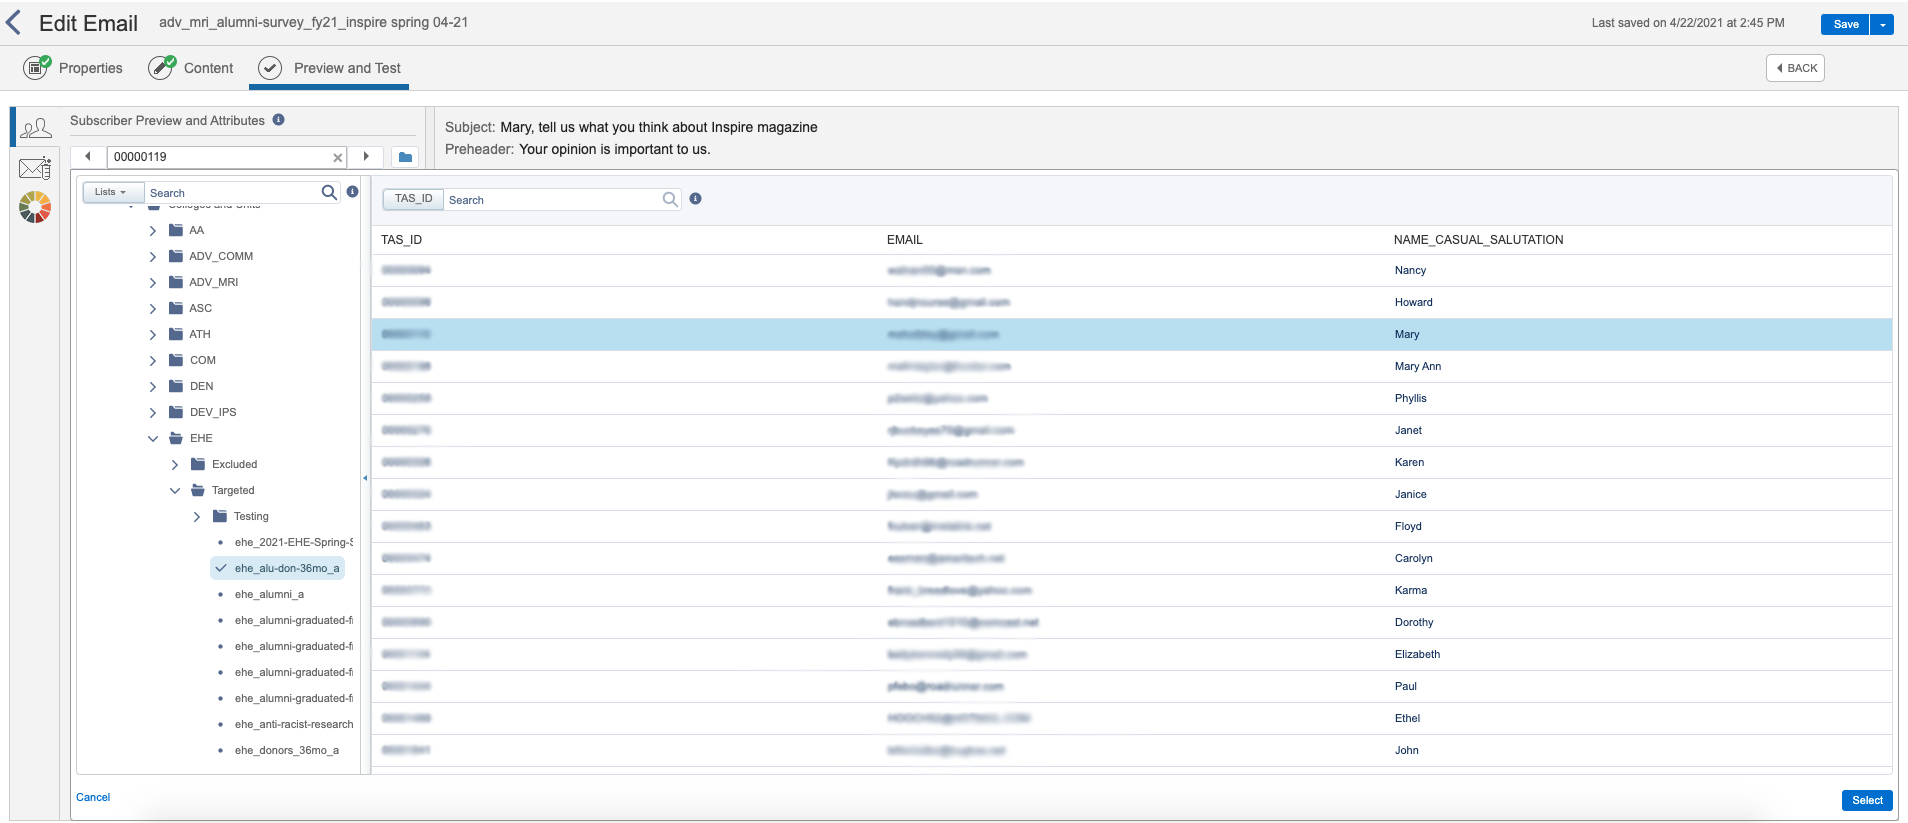
Navigate to the sending data extension you plan to use. Select a contact from the list, and click the "select" button.
Step 04
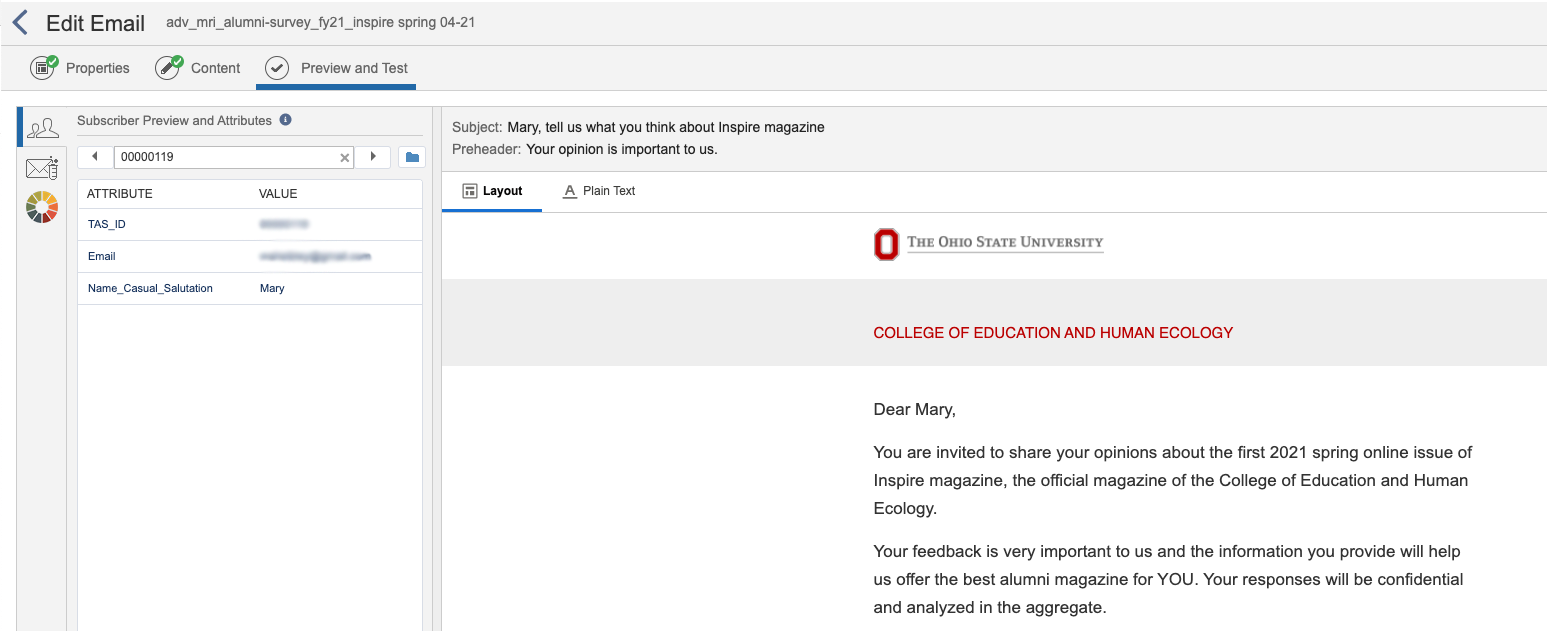
Your personalization field should now be populated with that contact's data, and the contact you're previewing with will appear to the left.
Step 05
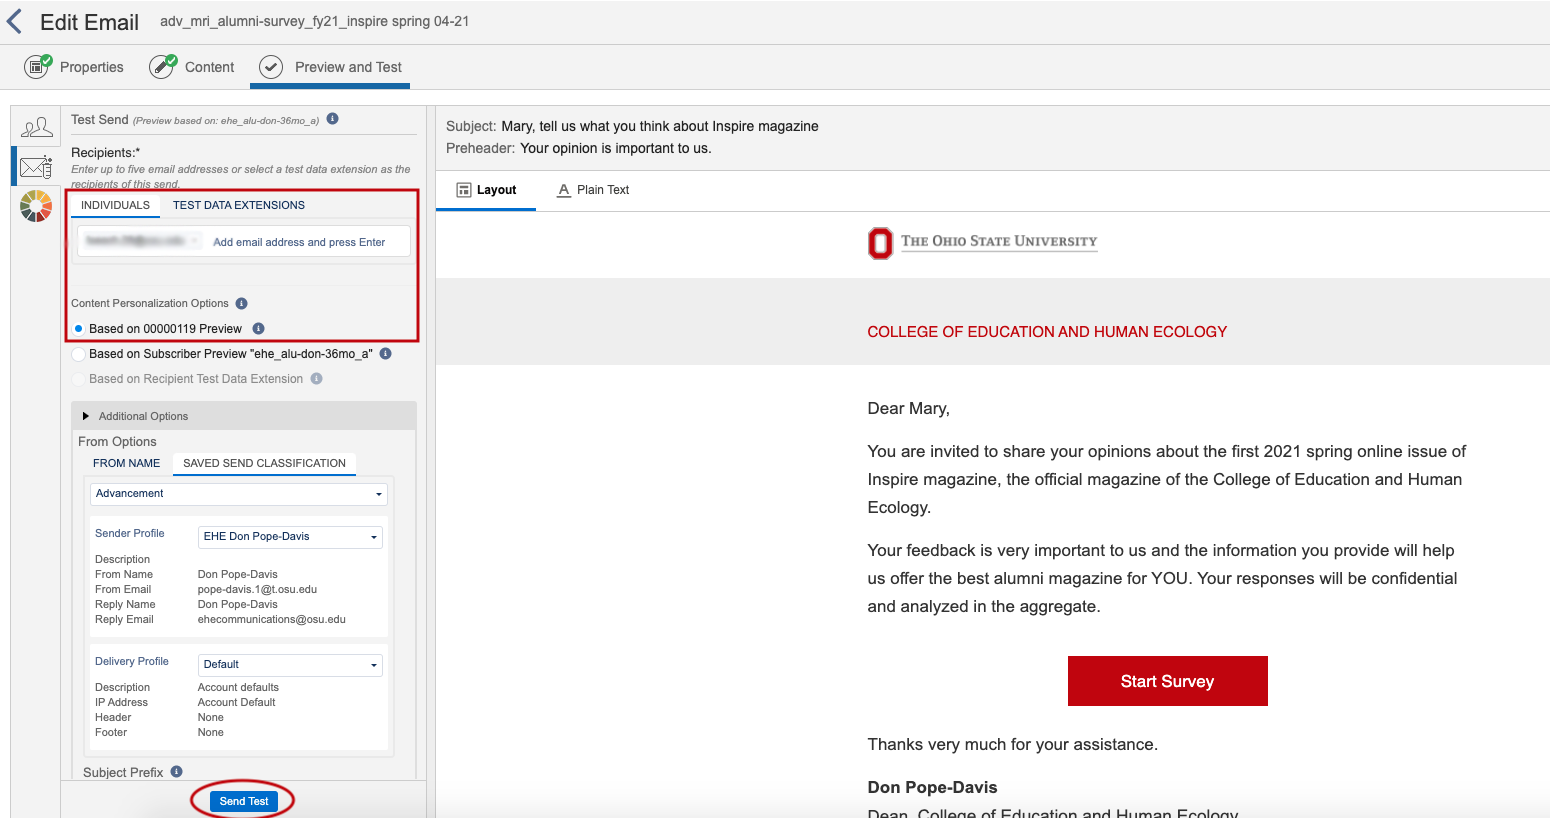
To test with the personalized data merged in for this contact, click the test send icon (email with a test tube next to it) and add the email addresses you'd like to test to. Choose your sender profile, then click "send test."
Step 06
The test email should arrive in your inbox with the selected contact's personalized data merged in.
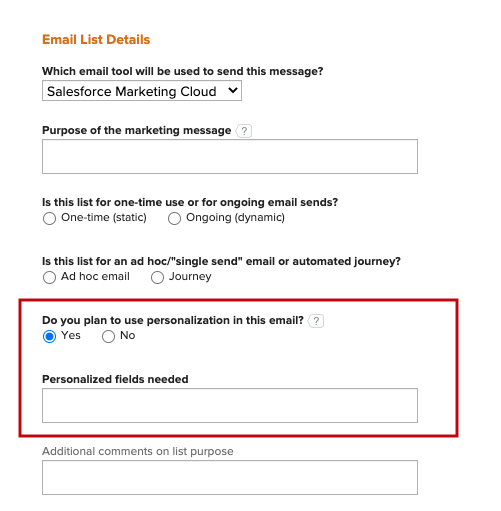
Note: Data extension attribute strings MUST be included in the data extension(s) you are sending to. If you do not see the field you need in the data extension, it will need to be added. If you are a user in the Alumni, Donors & Friends Business Unit, this is a question on the Workfront list request form. Be sure to include your personalization needs when you submit your request (Name_Casual_Salutation, the preferred first name field for TAS data, is included for all requests automatically). If you need personalization added to an existing data extension, submit a new request via the form and include the name of the existing data extension you'd like to modify.
Step 07
If you aren't sure if the field needed exists in your data extension or not, you check by either a) going through the steps of adding personalization to your email and looking at the available fields associated with your source data extension, or b) navigating to your targeted lists folder within Email Studio and opening the data extension(s) you plan to use. The fields included will be shown on the right.
